Sunday, December 28, 2008

Yum....

Loaded "Baked Potato" Soup

Courtesy of KraftFoods.Com

Loaded "Baked Potato" Soup
Prep Time:
15 min
Total Time:
30 min
Makes:
4 servings, about 1 cup each
What You Need
1 lb. baking potatoes (about 2), cubed
1 can (14-1/2 oz.) fat-free reduced-sodium chicken broth
1 cup milk
3 slices OSCAR MAYER Bacon, cooked, crumbled and divided
1 cup KRAFT Shredded Cheddar Cheese, divided
1 green onion sliced, divided
1/4 cup BREAKSTONE'S or KNUDSEN Sour Cream
Make It

MICROWAVE potatoes in large microwaveable bowl on HIGH 5 min., stirring after 2-1/2 min. Stir in broth and milk. Microwave 10 min., stirring after 5 min. Carefully crush potatoes with potato masher.

RESERVE 2 Tbsp. each bacon and cheese and 1 Tbsp. onions for topping. Stir remaining bacon, cheese and onions into soup.

SERVE topped with reserved bacon, cheese, onions and sour cream.

Serving Suggestion
Serve this hearty soup with a bagged green salad tossed with your favorite KRAFT Dressing and a whole wheat roll.

Variation
Peel potatoes before cubing.

Wednesday, December 24, 2008

December 24th - DECEMBER DAYS OF CRAFTING - Iced Sugar Cookies


Yep...I am making these for Santa. I hope he likes 'em. They look DARN YUMMY to me! Cake mix and Crisco....what more do you need. I hope mine look this good when I am all done.....

MERRY CHRISTMAS TO ALL!!!!!!!

SUGAR COOKIES WITH ICING
1 pkg. yellow cake mix
1 egg
3/4 c. Crisco, melted & cooled
2 tbsp. milk
Combine ingredients in bowl. Put into refrigerator for 2 hours. Preheat oven at 350 degrees. Roll chilled dough out on lightly floured surface to 1/4 inch thickness. Cut into shapes with floured cookie cutters. Place on greased cookie sheet. Bake for 15 minutes at 350 degrees or until edges start to brown. Makes 5-6 dozen medium cookies.

ICING:
3 oz. pkg. cream cheese, softened
1/2 c. powdered sugar
Dash of salt
1/4 tsp. vanilla
1 tsp. milk
Blend ingredients together until smooth. Add food coloring if desired. Spread over cooled cookies.

Tuesday, December 23, 2008

December 23rd - DECEMBER DAYS OF CRAFTING - Decorative Guest Towels

What a great site I found. There are ideas to last for days. Check it out... www.craftideas.info

Decorative Guest Towels for the Holidays
project courtesy of www.craftideas.info

Before you go out and purchase holiday towels, you can consider making some yourself for just a fraction of the cost. All you will need is plain towels and some Christmas fabric. These are not only lovely in your restroom, but also make nice gifts for friends and family.

Supplies needed:

- white guest or hand towels
- decorative Christmas fabric
- sewing supplies
- iron

Instructions:

1. To prevent later shrinkage, wash and iron the fabric before using.
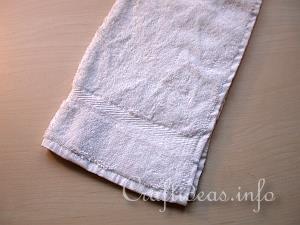
2. This is an example of a hand towel.
Tutorial - Designer Hand Towel 1 200

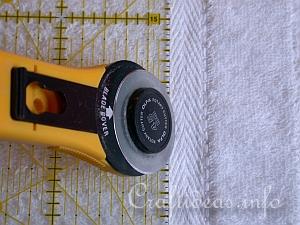
3. Cut the webbing away from the bottom of each side of the towel.
Tutorial - Designer Hand Towel 2 200

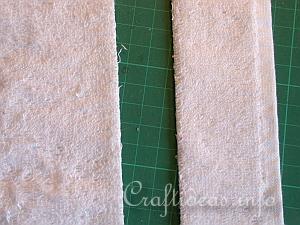
3. Once cut, it looks like this.
Tutorial - Designer Hand Towel 3 200

4. Cut a 5 cm wide strip of Christmas fabric. The width is the width of the towel plus 2 cm seam allowance.

5. Iron over 1 cm on each short side of the Christmas fabric. Pin the fabric now to both of the towel pieces you see in step 3, and sew with a 0.75 cm or 1/4 inch seam allowance. Zig-zag stitch the seams and press flat.

Monday, December 22, 2008

December 22nd - DECEMBER DAYS OF CRAFTING - Ribbon Christmas Tree

I found this great tutorial over at The Creative Elf. What a fabulous idea for all those ribbon scraps! You could even make one out of just about any ribbon! What fun. Be sure to check out her blog.

On another note....I am all about ribbon right now because, by using simple wooden clothes pins, I took my ribbon stash from this:
to this:


YAY FOR ORGANIZATION!! I wish I could get the rest of my life organized this easily....
-------------------------------------------------------------------------------------------------
RIBBON CHRISTMAS TREE TUTORIAL
project courtesy of The Creative Elf


Hello. I've been meaning to make one of these Trees for ages but finally got round to it last night. If you would like to make one you will need a large Polystyrene cone, lots of ribbon (most of mine was from Poppicrafts!) which you will need to cut into 4 inch strips (approx 200 of these!) and some sequin pins.

I painted the tree with a bright green acrylic paint first and allowed it to dry. I started at the bottom of the tree and just folded the ribbon in half and attached to the tree with one pin. Make sure your ribbons slightly goes over the bottom of the tree to so that it lays nicely. Just work your way up the tree, overlapping each layer.

I topped my tree with two wooden snowflakes that I had painted white, glued a needle in between them with about half an inch sticking out so that they could be stuck into the tree.

And there you have one tree to sit in the middle of your table on Christmas day!

Friday, December 19, 2008

December 19th - DECEMBER DAYS OF CRAFTING - Fish in a Bag Soap


Fish in a Bag Soap!

From:

Martha Stewart Show
-------------------------------------------------------------------------------------------------

I saw this and all I could think was HOW FUN!! I think the nieces and nephews would really dig this one. I might use a few more toys though. Please let me know if you make this one!! Happy Sudsy Crafting!

-Amanda
-------------------------------------------------------------------------------------------------

This easy-to-make soap is a wonderful gift for the kiddos in your life.

Tools and Materials:
Clear plastic bag: 4 inches wide by 8 inches tall, and at least 1.5 millimeters thick
Clear glycerin soap
Heat-resistant measuring cup
Double-boiler or microwave
Rubbing alcohol
Small spray bottle
Plastic fish
Clothespin
Ribbon
Gift tag

Fish in a Bag Soap How-To
1. Open the plastic bag and cuff the top enough so that the bag will stand on its own.

2. Place 4 ounces of solid clear glycerin soap in a heat-resistant measuring cup, and melt in a double-boiler or microwave.

3. Pour half the melted soap into the bag. Spray with alcohol until bubbles disappear. Allow to cool and harden for about 1 hour.

4. Re-melt remaining soap. Pour a small amount of melted soap on top of cooled soap in bag. Spray with alcohol. Position fish in melted soap, and let set 15 minutes to lock into place.

5. Pour the remaining soap over fish. Spray with alcohol. Gather bag above soap and pinch with clothespin. Allow soap to cool for 15 minutes.

6. Remove clothespin, and tie with a ribbon threaded with a gift tag.

Resources
Fish, bags, and soap can be purchased through goplanetearth.com. (but I think Michaels or JoAnn's might be worth checking!)

Thursday, December 18, 2008

December 18th - DECEMBER DAYS OF CRAFTING - No Sew Fleece Blanket and Pillow

I am sure you can pick better fleece than this picture. HOW DRAB...but I digress. I think this is a GREAT gift and if you just make the blanket, it's fairly inexpensive and really easy. NO SEWING REQUIRED! and...I think fleece is on sale right now! Happy Crafting!
-Amanda
-------------------------------------------------------------------------------------------------


Project courtesy of
Jo-Ann Fabric and Craft Stores®

SUPPLIES & TOOLS:


• Fleece print, 23⁄4 yds
• Fleece solid, 23⁄4 yds
• 14"x14" pillow form
• Scissors or rotary cutter and mat
• Tape measure

DIRECTIONS:

PROJECT TIP: Cut both layers of fleece at the same time.

BLANKET

1. From each piece of fleece, cut a 56"x70" rectangle.
2. Place fleece rectangles wrong sides together.
3. Cut out one 7" square from each corner of both fleece pieces.
4. To make the fringe, cut 7" into fleece at 1" intervals around all sides of both top and bottom.
5. Knot fringe pieces together around entire blanket, using one strand from the front and one strand from the back.

PILLOW

1. From each piece of fleece, cut a 26"x26" square.
2. Place fleece squares wrong sides together.
3. Cut out a 5" square from each corner of both fleece pieces.
4. To make the fringe, cut 5" into fleece at 1" intervals around all sides of both top and bottom.
5. Knot fringe pieces together on three sides, using one strand from the front and one strand from the back.
6. Insert pillow form between front and back fleece. Knot last side closed.

Wednesday, December 17, 2008

December 17th - DECEMBER DAYS OF CRAFTING - Cherry Berry Bread in a Jar

I made these one year and gave them to all of my family. I made a mix for cookies, but I thought this recipe was a little different. You could make up a batch and keep them handy for those last minute gift givers...you know the type....

"OH Thank you ....you shouldn't have...Wait just a sec, I have something for you too..."


ENJOY!

Check out www.ThatMyHome.com and www.RazzleDazzleRecipes.com for more ideas!

CHERRY BERRY BREAD IN A JAR

2 1/2 C all-purpose flour
1 tsp baking powder
1 tsp baking soda
1 tsp ground cinnamon
1/2 tsp salt
1 C oats (quick or old-fashioned, uncooked)
3/4 C dried cherries
3/4 C dried cranberries

In a large bowl, combine flour, baking powder, baking soda, cinnamon and salt; mix well. Add oats, cherries and cranberries; mix well. Transfer to resealable plastic bag, a decorative jar with lid or other airtight container. Store in cool dry place.

Variation
Substitute raisins for dried cherries and cranberries and increase ground cinnamon to 1 1/2 teaspoons in mix.

Instructions to be included with gift jar or bag:

3/4 C honey
3/4 C milk
12 tbs (1 1/2 sticks) butter or margarine, melted and cooled
2 large eggs, lightly beaten

Preheat oven to 350ºF.

Lightly spray four 6 x 3 3/4-inch disposable aluminum foil mini loaf pans with no-stick cooking spray. Or use two 8 x 4-inch disposable aluminum foil loaf pans.

Place bread mix in large bowl. In small bowl, combine honey, milk, butter and eggs with wire whisk or fork; mix well.

Add to dry ingredients all at once; stir just until dry ingredients are moistened. (Do not overmix.) Pour into pans, dividing evenly.

Bake mini loaves for 23 to 27 minutes or regular loaves for 35 to 40 minutes or until tops of breads feel firm when touched and wooden pick inserted near center has a few moist crumbs clinging to it. (Do not overbake.)

Cool breads in pans on wire rack. Wrap tightly in aluminum foil. Store at room temperature up to 2 days.

For longer storage, label and freeze. Makes 2 large or 4 mini loaves.

Tuesday, December 16, 2008

December 16th - DECEMBER DAYS OF CRAFTING - Handmade Napkin Rings

SO....I found lots of links for this idea but no pictures. So here I go with another tutorial!

Handmade Napkin Rings

Supplies:

  • 1 tube from a paper towel roll or 2 toilet paper tubes (for 4 napkin rings)
  • scissors
  • tape
  • wrapping paper strips or ribbon

Directions:

  1. Cut your cardboard tube into sections that are about 2 inches long
  2. Tape the end of the ribbon or the wrapping paper to the inside of the tube.
  1. Wrap the ribbon or paper around the tube until it is completely covered. Make sure the pretty side is showing!
  2. Secure the loose end of the ribbon or paper to the inside of the tube.
  3. Insert your pretty napkin (or paper towel :) ) into the napkin ring.


VOILA! Homemade Napkin Ring....So easy...even a 3 year old can do it!

Monday, December 15, 2008

December 15th - DECEMBER DAYS OF CRAFTING - Grab Bag of Crafts

http://www.allfreecrafts.com/christmas/

Okay, so I missed a couple of days. Maggie was sick, I wasn't full of pep...more like full of p*ss and vinegar if you asked my husband....but this should make up for it. This is a great site with lots of links to craft tutorials. I will be back with the good stuff tomorrow. If you find something you think I should feature...lemme know!

Happy Monday everyone!

Thursday, December 11, 2008

December 12th - DECEMBER DAYS OF CRAFTING - Skirt Apron


My First Tutorial!

EASY SKIRT APRON


I was searching online for an easy apron tutorial. I didn’t want bells and whistles and I didn’t want the top part that usually goes over your neck. I just wanted something simple that I could wipe my hands on while cooking and just toss in the wash when it was dirty. I couldn’t find it. SO…what is a crafter to do? I made one. I think it’s perfect. I used scraps that I had and didn’t buy one thing to get this done. It turned out so well, I thought I would make a tutorial for all those others like me who just want something simple. This is my first attempt at a tutorial, so you may have to bear with me. I may explain some things too much and others not enough. PLEASE send your comments!


SUPPLIES:

  • About a ½ yard of fabric
  • 2 yards of ribbon for the waist belt
  • Embellishment ribbon (optional)
  • Coordinating thread


DIRECTIONS:

  1. My piece of fabric measures 28” x 18”, 22”x18” should work too. Lay out your fabric and determine the top of the apron.
  2. Put a hem in the bottom of the fabric by folding up ¼” and ironing and then another ¼” and ironing. Pin this in place.


  1. Do the same hem on both sides and pin in place. NOTE: I clip the corner of the first fold to keep the hem nice and neat at the corners.


  1. Do a zig-zag or straight stitch all the way around to secure your hems.


  1. Do a zig-zag stitch (or serge) the top, unfinished edge of the fabric. You want to contain the top edge inside the stitch so the fabric no longer frays.


  1. Remove any pins you have in the hems. Now it’s time to start the pleats! Fold your fabric in half and then half again and iron. These fold lines will be your guide lines for the pleat placement. Once you have these lines, fold the fabric to form about a one-inch pleat. You should have two pleats on each side, one on either side of the quarter width mark. I just did my by sight. Don’t freak out about the placement just find a place that looks right and iron in the pleat. Here’s what mine looked like:


Once you have your pleats ironed in place, pin them. Them do a straight stitch across the top to secure them in place.

  1. Now on to the fun part! Use your 2 yards of ribbon to add your waist tie. I found the halfway point in my ribbon and lined it up with the middle of my apron. I pinned the ribbon in place and sewed a rectangle (across the top, down about ½ inch, across again, up about a ½ inch to meet up with where I started) to secure it to the apron.


  1. When I got done with that, I thought it needed a little more. It’s up to you. You can be done here or you can keep going. I just took a smaller, orange, grosgrain ribbon scrap and sewed it on top of my white satin ribbon.


  1. Remove all your pins and lightly iron anywhere it looks lumpy. But be careful satin ribbon can melt easily if the iron is too hot! This apron was supposed to have an orange tie…oops.

NOW YOU’RE DONE!!!


I would show you what this looks like on, but I am home alone tonight, and currently in my oh so comfy, but oh so ugly sweats.

Send pictures if you make this! And please send comments if I need to be clearer in any step!!!

Happy Crafting!

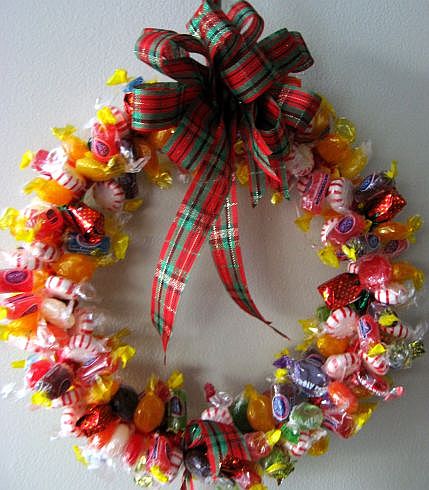
December 11th - DECEMBER DAYS OF CRAFTING - Candy Wreath

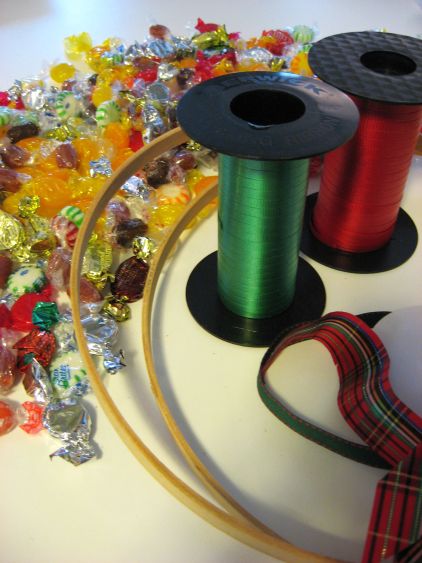
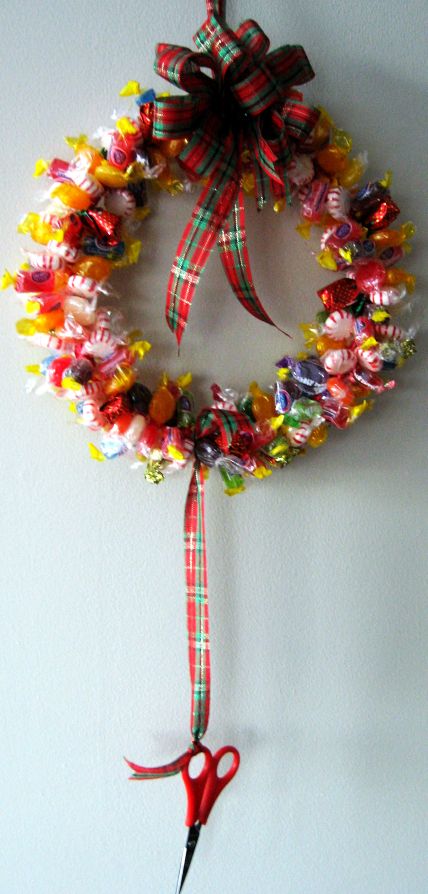
CANDY WREATH


Thanks to Cindy over at www.SkipToMyLou.org for posting this fantastic tutorial yesterday! I was so excited about it I almost posted two crafts yesterday! But, alas, I decided to wait. Here are my thoughts on today's craft project:
  1. Use all kinds of candy and don't worry about writing on the wrappers.
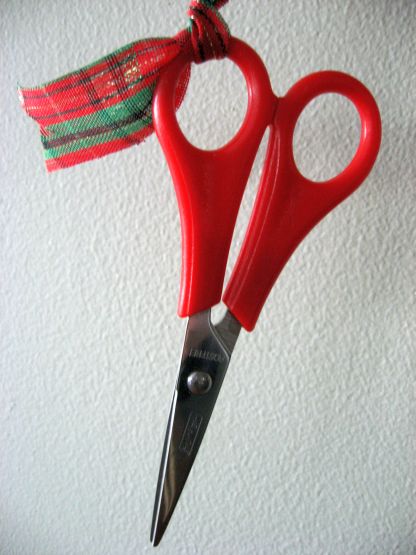
  2. If you do use the scissors, be sure to cut the candy packaging and not the ribbon they are attached with or you will have to eat the numerous pieces that come off when the ribbon unwinds. (Maybe not such a bad thing)
  3. If it were me...and it's not....I would just take the candy out of the wrapper and leave the wrapper attached to the wreath. I have heard that all the empty wrappers make a pretty neat wreath as well.
  4. Lastly...EAT IT! I know you will spend some time putting all of those candies on that wreath and have a secret desire to use it again next year, but trust me, those candies will be GROSS after a year in the basement or attic. That is if the mice and other random creatures don't get to them first.
HAVE FUN!!
(And make sure to get some extra candy for eating while you are crafting!)

-Amanda
-------------------------------------------------------------------------------------------------

First you need curling ribbon, some pretty ribbon to make a bow, a small pair of scissors, an 8″ or 9″ embroidery hoop, spray paint or colored electricians tape and 3 lbs of hard candy.

You can also use the part of embroidery hoop with the metal closure– just tape over the metal part to secure it together and make sure you place it at the bottom when hanging.

Did I mention loads of candy

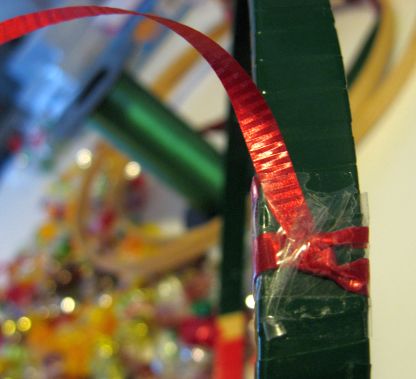
First paint or cover your hoop with colored electricians tape (makes it a little prettier as the candy is removed). Begin by tying about a 2 yard piece of curling ribbon to the hoop and then covering the knot with tape.

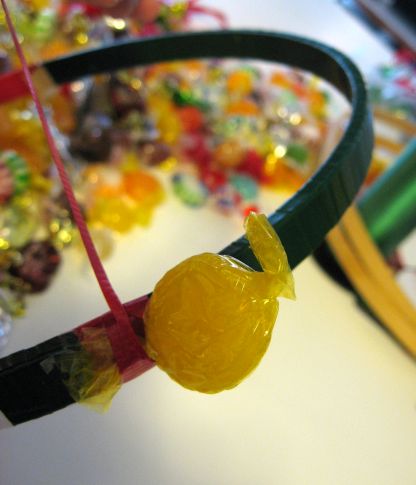
Place a piece of candy on the hoop and tightly wrap the curling ribbon around the hoop catching the tail of the candy wrapper

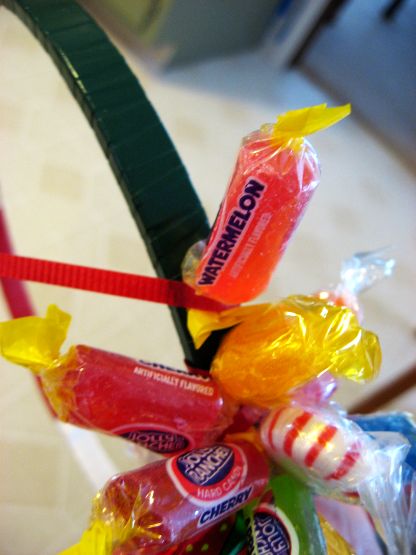
Continue wrapping the candy to the hoop. If the curling ribbon runs short tie off the ribbon to the hoop and tie on another piece and begin again. Wrap the candy as close together as you can so you have a full wreath.

When finished wrapping all of the candy, tie on a pair of scissors for cutting off the candy.

Tie on a loop of ribbon for hanging and add a bow!

Sweet!

Wednesday, December 10, 2008

December 10th - DECEMBER DAYS OF CRAFTING - Stacking Fabric Christmas Trees

fabric christmas trees BLOG.jpg

Project Courtesy of Sarah over at www.TheSmallObject.com

She has a great blog with lots of fun ideas! Be sure to check it out!

-----------------------------------------------------------------------------------------

I think these are great! And a great way to use up your leftover Christmas Fabric Scraps. I think you could almost get away with these as a no sew project. Let me know if you have questions and be sure to send pictures of what you are crafting!

-Amanda
----------------------------------------------------------------------------------

STACKING FABRIC CHRISTMAS TREES

fabric christmas trees BLOG.jpg

Download the Stacked Fabric Christmas Tree templates as an Adobe pdf file or by printing the image here. To make them, download and print out the Adobe pdf file with the templates for the four sized cones. Using the pattern, cut out the four semi-circles from various fabric. I then ironed on some lightweight interfacing to the backside.

fabric christmas trees zig zag edge 227.jpg

After you have four semi-circles of fabric, I used a small zig-zag stitch around all the edges.

fabric christmas trees cone fold over BLOG.jpg

Fold over the edges to make a cone shape. You will overlap the two ends about 1 inch to make the diameter of the size cone you wish.

fabric christmas trees straight stitch back BLOG 227.jpg

Then I used a straight stitch to close up the backside of the cone. Iron this seam so the cone will stay open in a nice round form. Alternately, you could hand stitch the back seam closed.
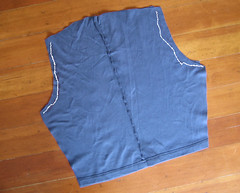
After you have finished all four cones for one tree, I added a small bit of hot glue to the top of each cone so that when they were stacked they are stable. You could also stuff the bottom with a little tissue, if you like. But they stay open nicely without it, too.

fabric christmas trees done BLOG.jpg

I made several and love how they look in a little grouping. Let the holiday decorating begin. Game on.

Tuesday, December 9, 2008

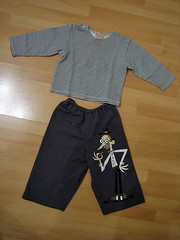
December 9th - DECEMBER DAYS OF CRAFTING - Baby Pajama Pants

EASY BABY PAJAMA PANTS

Everybody needs new pajama pants for the holidays.

Now you can take one of your old tees and turn it into something cozy and fun for your little one!

Today's project has two sources. Be sure to check them out.

WWW.HANDYPROJECTS.BLOGSPOT.COM

and

WWW.ROOKIEMOMS.COM

For this tutorial...click here

HAVE FUN!


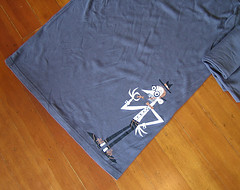
1. Identify an appropriate t-shirt or sweatshirt. (or just get a yard of some of your favorite fabric and fold it in half)

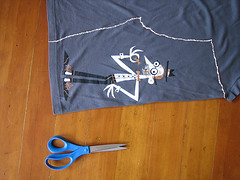
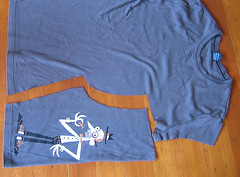
2. Fold a pair of baby’s pants with crotch sticking out and trace. I have outlined what it should look like for you. With this placement of the cut, you will not need to hem the bottom. (if you use a yard of fabric instead, you can just do a simple turn under hem to finish the bottom)

3. Cut on your traced line.

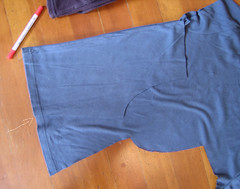
4. Cut a second pant leg from the other side of the shirt. Look for the arrow on the left in this picture to see how I used my first pant leg as a guide.

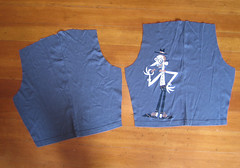
5. You have two pant legs now, right?

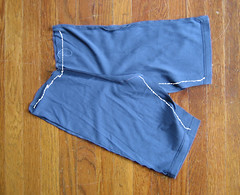
6. Place right sides facing each other and pin. Sew along curves.

7. Reorient the pants and you’ll see that you just have a crotch to sew up and a waist to fold over and sew. Leave a space to thread the elastic through.
Sew crotch seams up and fold over panel for waist

8. Insert elastic, sew waist closed, and you are done!

Insert elastic and close up.  Voila!

Little Ones

Lilypie Fourth Birthday tickers
Lilypie Second Birthday tickers

Where in the World are YOU From?